
It’s no secret that plastic cutting boards can be challenging to clean. Not only do they harbor bacteria, but the grooves and ridges make it hard to get them really clean. And if not cleaned properly, these boards can start to smell over time. But there’s a way to fix that. In just a few simple steps, you can resurface your plastic cutting board, so it looks fabulous again – and is easier than ever to keep clean!
To resurface a plastic cutting board,
- First, collect resurfacing supplies.
- Securely fasten the cutting board in place before beginning to work on it for your safety.
- To begin the sanding process, use a metal scrubber to eliminate plastic burs and prepare the board.
- Start sanding with the coarsest paper and work your way up to fine grit.
- Carefully scrape the surface of your project and its corners for a flawless finish.
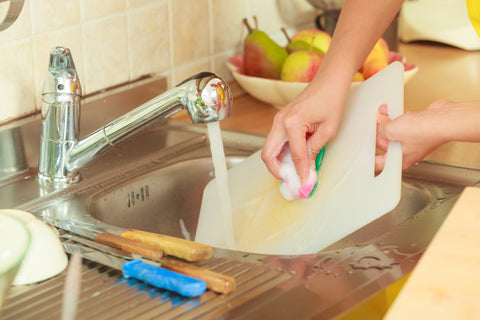
- Finalize the process with a meticulous clean-up.
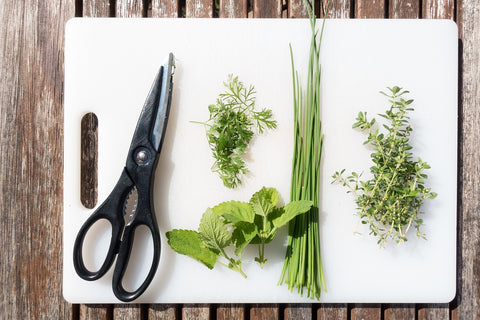
Image by Stefan Schweihofer from Pixabay
Resurfacing a plastic cutting board is not just pocket-friendly but also a great way to reduce your carbon footprint on the planet as you have opted to reuse your old cutting board. Isn’t that fantastic? Now let’s dive deeper into this topic by quickly going through some of the most frequently asked questions to gain a better understanding.
- Can you resurface a plastic cutting board?
Cutting boards are staples in kitchens from home to restaurants. While plastic cutting boards are great to have around in the kitchen, they sometimes need a little TLC to keep looking and functioning their best. Fortunately, resurfacing them is easy and will make them look brand new again!
You just need some sandpaper and elbow grease to buff out small cuts, scrapes, or stains until the cutting board has its original surface. It’s important to remember that plastic cutting boards cannot be resurfaced as extensively as wooden ones. But that doesn’t mean you can’t restore them to their original glory – it just requires some extra attention when sanding!
- What’s the best way to clean a stained cutting board?
Cleaning a stained cutting board can be easy and fun! The best way to do it is by using baking soda and a sponge with warm water. First, sprinkle the baking soda over the surface of the cutting board and spread it evenly. Next, gently scrub the area in a circular motion with the sponge to start working up a foam before rinsing off with warm water.
mage by Anetlanda from Depositphotos
For more stubborn stains, add some white vinegar to loosen them. Once you’re done cleaning it off, dry the cutting board with a kitchen towel or leave it to air dry before using it again. This simple method will make your stained cutting board look brand new in no time!
- Do you ever season your cutting board?
Have you ever thought of your cutting board as an old friend? I always make sure to sprinkle some love over my fare parchment every once in a while by seasoning it with oil. Not only does it extend the life of the board, but it creates this beautiful patina on the surface that just begs to be used.
Plus, knowing that I’m caring for such a staple kitchen tool helps me stay mindful and present when cooking. At the same time, I get plenty of laughs from the look on people’s faces when they peek inside my cupboard and see this shined-up wooden rectangle! So why not show your cutting board some tenderness and give it a good seasoning every couple of months? You’d be amazed at how much love and care can go into just one little everyday task.
- How to season a cutting board for better performance?
Cleaning and seasoning your cutting board is the best way to ensure that it continues to perform beautifully for years to come. Seasoning not only enhances the beauty of the board but also helps protect it from moisture and physical wear caused by slicing and dicing. To get started:
- Give your board a good scrub with warm soapy water, then rinse and dry thoroughly.
- From there, rub a light coat of mineral oil into the surface of the board – olive or vegetable oil can also be used if necessary.
- Apply several coats over time, wiping away any excess oil between applications until you end up with an even glossy layer that has sealed in your board’s natural luster.
- Get ready to enjoy your seasoned cutting board!
Image by congerdesign from Pixabay
- When should cutting boards be replaced?
Keeping your cutting boards in good condition is the key to keeping up a clean kitchen – after all, it’s where you prepare food for your family! To ensure your cutting board is always ready to be used and is safest, you should replace it when it has accumulated deep cuts or cracks. You should also replace them if they begin to smell odd or discolored – this often happens with wooden cutting boards. All in all, if you hand wash and store your boards properly, you can continue using them for years before needing to replace them!
- Can you microwave a plastic cutting board?
While a plastic cutting board is a kitchen essential for food preparation, it is important to remember that the appliance designed to make our lives easier – the microwave oven – should not be used in conjunction with them. Microwave radiation has no place near a plastic cutting board, as it can cause irreversible damage to both the board and, more importantly, your health.
With so many alternatives available nowadays, such as glass or bamboo cutting boards that are safe to use with microwaves, everyone can enjoy fulfilling meals free from contamination, hassle-free – when they don’t combine plastic with microwaving.
It is important to take care of your kitchen cutting boards – whether they’re made from plastic, wood, or bamboo. Not only do they make food preparation easier and safer, but they can also last for years with the proper cleaning and care. So be sure to season them regularly, clean them properly, and replace them when necessary in order to keep your family safe and healthy!