
Idling around in the living room on a lazy afternoon is my all-time favorite hobby. I’m not a couch potato, but I always enjoy lounging on the couch. My sofa is my comfy zone, as my sofa cushion never slides off from the sofa or sinks in. Please don’t get me wrong. I used to have the cushion sliding problem years ago when my husband figured out an excellent way to fix it. As a result, my cushions remain fixed and don’t move even an inch, which remains that way until today. And I am thrilled to share it with you.

Photo by Curtis Adams / Pexels
The foolproof way to keep the couch cushions from sliding off is to redo the base of the couch, similar to a bench cushion. Cut plywood to the size of the couch’s base and fix a foam over it using glue. Wrap it around with furnishing material and attach the fabric to the bottom using staples. Lay the couch base down on the sofa’s frame and enjoy!
Everyone who owns a couch faces this problem at one time or the other and is looking for a solution. Replacement of the entire sofa is a quick fix but is a costly deal. However, there are many ways to fix this issue. Try and see what works best for you. Come, let’s explore together the various options available.
-
Shelf Liners:
You read it right! Adding shelf liners to your sofa’s bottom may resolve the sliding issue. If you have them in hand, you can go ahead and try them immediately. Just line them up under your cushions, and you’re good to go.
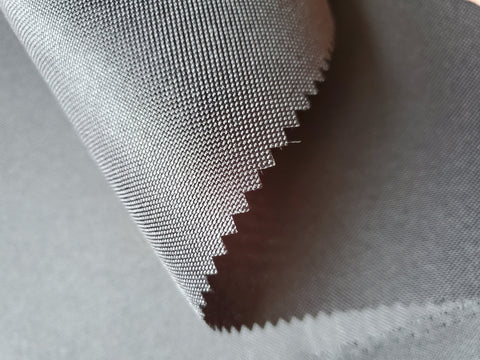
Photo by Pexels
Is your lounge too big for the shelf liners you have at home? Get bigger ones from the store. Are they too big? Measure your couch cushion’s dimensions and reduce an inch – you don’t want the shelf liners hanging out, right! Mark the reduced measurements on the liner and snip the extra portion off. Now lay them down under your cushions and check.
Did you have any success? Yes! Great.
If no, then move on to solution No. 2.
-
Non-Slip Cushion Gripper:
You are here because your shelf liners didn’t work as well as you thought they would. Or is it that they initially worked well but started bunching up after some time?
Then try these non-slip cushion grippers designed especially for this purpose. You just have to unpack them and lay them down under your cushions. And there you go! You’ve solved the problem with almost no effort of yours.
These are available online. They are sturdy, and so they retain their shape well. They don’t curl up like shelf liners as they have stiff borders on all sides. See if this works for you.
-
Non-Slip Velcro Cushion Pads:
The next best option is the non-slip velcro cushion pads. Before using these, vacuum your sofa clean and make sure the sofa’s exterior is spic and span and dust-free. These pads are super easy to install, and you can fix them in a jiffy.
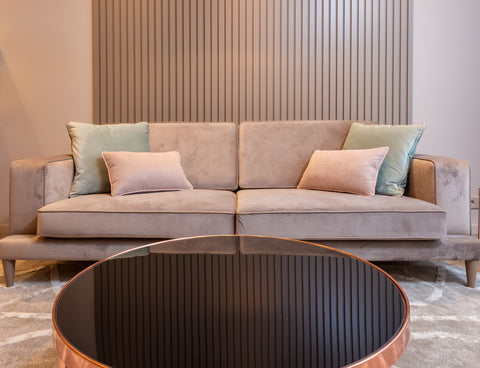
Photo by Max Vakhtbovych / Pexels
A word of caution – Don’t attempt this method if you have a plush leather sofa.
Even if you don’t have a leather sofa, take a preventive test on a small area of your couch (preferably the back). This is to check how the sofa material reacts to your adhesive before going ahead and pasting it. If there is no reaction, go ahead and stick it.
If you’ve bought these cushion pads, installation is a piece of cake.
- Mark the exact place of attachment on the couch as well as the cushion.
- Check twice for the correct alignment of the matching pieces before moving over to the next step. You don’t want to make a mistake here.
- Strip off the paper and stick the hook pads to the marked places on your sofa.
- Repeat the same process with the loop pads and stick them on the cushions.
- Seat your cushions on the couch.
- Unite the hook and loop and press them.
If you want to do it the DIY way, you can easily give it a try. First, buy some good-quality Velcro strips and cut the strips into small squares or strips, according to your preference. You don’t need to be a sewing expert to stitch them onto your cushion. All you need is some basic sewing skills, and it takes very little time to get them on it. If you are not comfortable using a sewing needle, the best alternative is to opt for a fabric adhesive.
Attach the hook part of the Velcro strip to the couch and the loop part to the cushion. Cross-check twice for alignment of the strips to meet up exactly when the cushions are put back in place.
This resolves the problem to a great extent, as some people say. Only time will tell.
-
Anti-Slip Sofa Cover:
Do you have a swanky leather sofa? Great! Then this one is for you.
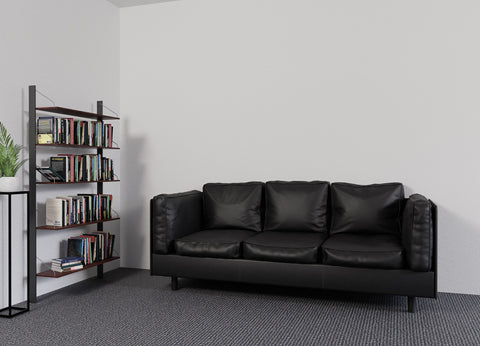
Photo by Mediamodifier / pixabay
Getting sofa covers for your expensive leather sofa is probably your best bet. It is as easy as putting on a mattress cover. Unpack the sofa cover and dress up your couch in the blink of an eye. The sofa cover has straps and strings to keep it in place. Tie the strings tight so the cover stays intact. The sofa cover also serves the purpose of holding the cushions in position.
If you have pets or small kids, this doubles up in its use as protection from dirt and stains and keeps your expensive sofa clean. Not to mention the fact that it also helps prevent general wear and tear over time. If you are accident-prone, you can opt for a waterproof one to avoid spills and splashes, which is a fantastic option.
To give your couch a smug look, push in Slipcover Grippers or Tucks on the sides and backs of the cushions. These help to firmly fix the sofa cover and to keep it wrinkle-free.
The sofa covers are available in a wide variety of colors, textures, and materials. Choose the one that’ll suit your decor and your taste.
Try the sofa cover to find out if this solves your problem.
-
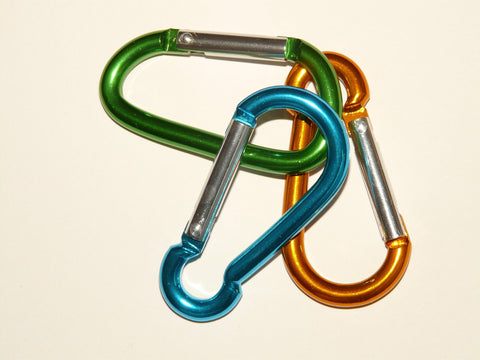
Hook and Ring Method:
Have you ever considered the hook and ring method for solving this issue?
- Choose a fabric to be attached to your couch’s bottom and couch cushion. Cut two equal pieces of the material.
- Remove the pillow from its cover. Attach one of the fabric pieces to the cushion cover and the other to the couch.
- Sew the hook to one piece of fabric and the eye or the ring to the other, ensuring their placement and alignment.
- Repeat the process for all the cushions. Hook both of them up and sit back and relax.
This method is easy to install and doesn’t leave marks behind when you want to opt out and try something else.
-
Tieing Method:
Managing cushions with this one is easy peasy. Sew ribbons to your couch cushions and use the strings to tie the cushions to the couch frame. Use this method for both the couch cushions and the back cushions. Your pillows are now secured in place.
-
Fix the Saggy Couch:
Do you feel that your couch has only been sliding off of late and was a perfect fit before? Then, check if you have a sinking couch. When you fix the sag, the sliding problem will resolve on its own.

Photo by Max Vakhtbovych / Pexels
Examine the couch to see where the problem lies. Check whether it is due to the cushions, springs, or frame.
- Replace the foam and batting: If the sofa cushions are lumpy, the problem lies with the cushions. So, either replace them or restuff them.
To restuff them:
- Open the cushion’s zip and remove the old cushion stuffing.
- Cut your new foam to size and wrap the batting around it.
- Fix the batting to the foam with either staples, adhesive, or both.
- Put the new foam with batting inside the cushion and close the zip.
You can do the same for the back cushions. Add some muscle to your couch’s shoulder by firming it up with extra stuffing of batting or replacing the foam and plumping up the sofa.
- Spring Problem: If it is sagging because of a loose spring, pull the spring up and add foam strips beneath it. This increases the springs’ tension and reinforces the sofa springs. Or you can use a spring puller to tighten up the springs. If it is a broken spring, replace it. Or if it is just a matter of providing extra couch support, install it.
- Broken Frame: Get it fixed if the slumping sofa is because of a broken frame. Gauge the extent of damage and see if it can be redeemed. Use metal plates to bolster the damaged wooden frame.
Once you’ve fixed your sagging sofa, you’ll be astonished to find that your sliding problem has also been rectified.
-
What is the permanent solution for cushion sliding off from the couch?
Are you tired of all the above methods without lasting results?
Last but not least, this is a method that we tried at our home and found it an absolute success for so long, so much so that we forgot we even had the cushion sliding problem.

Photo by Max Vakhtbovych / Pexels
But let me remind you that you need to redo the couch cushion from scratch to make this work for you. If you have cushions permanently attached to the couch, then this may not work for you. This is a DIY project in which we will be building the bottom of the sofa. It is similar to part of an outdoor sofa construction. This work can be done in your garage or basement, and you’ll be needing some tools to do this task.
To make this DIY bench cushion, you’ll need:
- Plywood, the size of the bottom couch.
- Upholstery foam for the sofa’s base.
- Spray adhesive.
- A heavy-duty upholstery staple gun.
- An electric-operated saw or a manual hand saw.
- Couch upholstery fabric or material of choice.
Step 1: Measure the exact measurements of the couch base and cut the plywood so it fits perfectly into the couch’s frame.
Step 2: Cut the upholstery foam to size. It should be precisely the same measurement as the plywood and should be an exact fit.
Step 3: Measure and cut the upholstery material or fabric. Ensure that you have enough material to wrap it around the cushions’ corners, extend it down to the back, and be adequately secured.
Step 4: Drizzle the spray adhesive on top of the plywood and the foam. Wait for a minute and assemble the foam exactly over the plywood and apply pressure. Let it dry. Confirm that they have bonded well before moving on to the next step.
Step 5: Dress up the foam-plywood assemblage with the fabric or upholstery material, ensuring that it snuggly wraps it on all sides.
Step 6: Now turn over the assemblage. Fasten the cloth or upholstery material to the bottom of the plywood by driving in staples using a staple gun.
Ta-da! Your handmade couch seat is ready for use.
Place your couch seat on your sofa frame and throw in some pillows for back support. Enjoy your lounging passion with no more worries of couch cushions slipping beneath you. The structure provides good support to the whole sofa and helps you relax comfortably.
It has been at least 15 years since we did this to our sofa, and I almost forgot that we ever had this problem. The plywood is still in place and in good shape. However, my little son has poked holes in the canvas wrapping material. He has also etched out pieces of foam out of the holes with his little fingers. It needs a complete makeover now. I am all in for a new facelift for my sofa.
Our journey never ends!